Last time, we completed the electrical assembly, and now, we’ll assemble things into the cabinet.
I don’t have a lot of photos here, because I did things incorrectly so many times. I had to re-solder the speaker wires, as well as remove and re-insert the circuit board many times. Why? I didn’t study the exploded mechanical diagram of the cabinet closely enough. Having learned from my experience, here is my recommended order of operations:
- Attach the metal standoff screw assembly to the circuit board. Place the threaded stud through the hole in the circuit board near C1, R1, and the SFU. Place the lock washer and nut on the solder side of the board, and tighten securely.
- Attach the speaker wires. Pretend they’re like any other components. Stuff the small stripped end in through the board from the component side, then solder on the solder side of the board. After the wires are soldered in place, stuff them back down through the holes next to R12.
- Separate the white plastic speaker grille from the colored plastic portion of the box. Place the speaker into its hole. The widest portion of the speaker will rest between the grille and the colored portion of the box. Attach the grille using the four screws provided. The speaker is now securely mounted in the chassis.
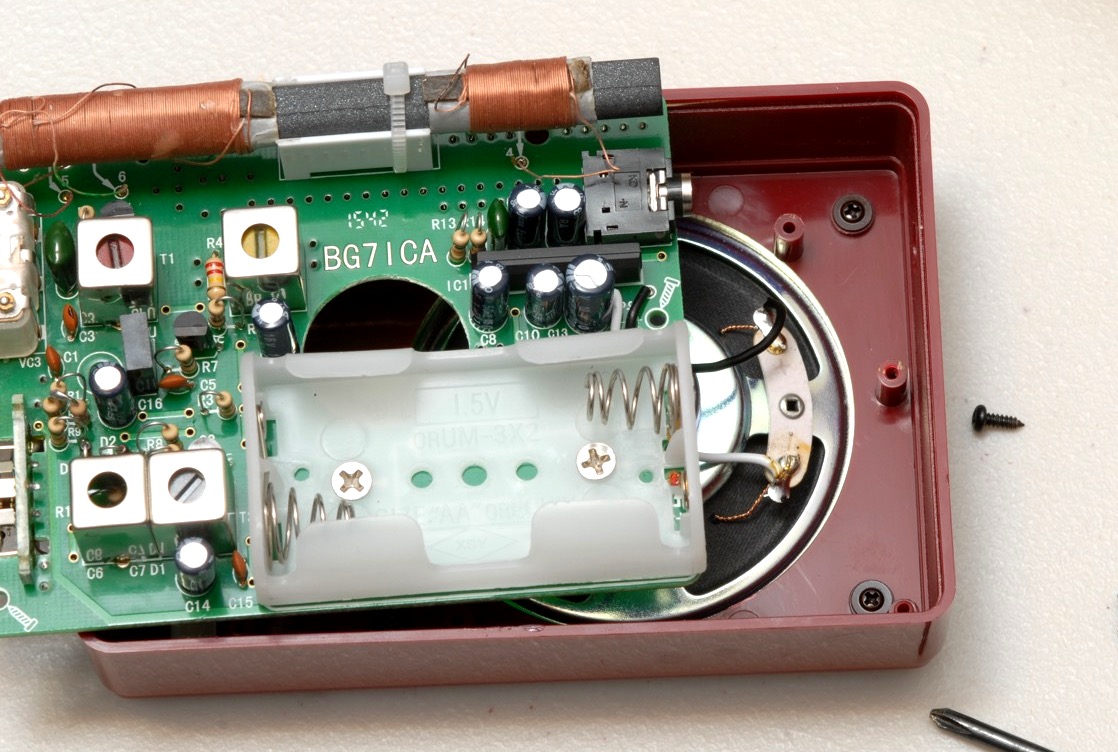
- Solder the speaker wires to the speaker. Here is a photo of the radio at this point.
- Put the circuit board into the chassis, and attach it with the screws.
- Put the white back piece onto the chassis, and attach it to the standoff with the screw that came with the standoff assembly.
That’s how it should be done. I didn’t do it that way. For your entertainment, here are the steps I used:
- Attach the speaker wires to the board (correctly, according to the procedure I described above).
- Solder the speaker wires to the speaker.
- Try to put the speaker in the cabinet from the inside, and fit the board over the speaker, and realize that there isn’t enough room for the speaker to be on the inside of the colored plastic portion of the box.
- Desolder the speaker wires
- Insert the speaker on the outside of the box, were it’s supposed to go.
- Re-solder the speaker wires to the speaker
- Insert the circuit board into the box, and tighten all the screws.
- Try to place the grille on the front of the box, and realize that it needs to be screwed into place from the circuit board side, and the circuit board must be removed to accomplish this.
- Unscrew the screws holding the circuit board in place.
- Remove the circuit board.
- Screw the grille into place (that’s when I took the photo above).
- Reinsert the circuit board
- Screw the circuit board into its place.
- Realize that the standoff hasn’t been inserted, and inserting it requires access to the other side of the circuit board.
- Unscrew the circuit board.
- Remove the circuit board.
- Insert the standoff into the circuit board
- Re-insert the circuit board
- Screw the circuit board in place.
- Attach the back of the case.
I ended up getting the job done, but I don’t recommend you follow these steps!
After the mechanical assembly is done, you can perform the alignment process as described in the manual. My example of the radio worked pretty well even before alignment, but going through the alignment process improved its sensitivity and calibrated the tuning dial positions so that they correspond more closely to the frequency of the stations received.
What a great tutorial on assembly! I have had the kit for some time (almost forgot I had it!). I have moved it tot he front of the stack for building – so glad I stumbled on your postings. I actually found you through a QRZ posting on RFI. Cheers, and thanks again for the extensive documenting of your assembly!
Thanks for the comment and glad to provide motivation to melt some solder! I took a look at your site and found lots of nice radio articles that will keep me busy for a while.
73 de ag6qr